在深度学习领域,卷积神经网络(CNN)已成为图像识别、目标检测、语音识别等任务的核心技术之一。Keras 作为一个高层次的神经网络 API,因其简洁易用而受到广泛欢迎。通过 Keras,我们可以快速搭建、训练并部署复杂的神经网络模型,而无需关注底层实现细节。本文我们将学习使用 Keras 一步一步搭建一个卷积神经网络。具体来说,我们将使用卷积神经网络对手写数字(MNIST 数据集)进行识别,并达到 99%以上的正确率。
我们还将介绍Colaboratory——一个免费的 Jupyter notebook 环境,关键的是可以免费使用 GPU(学生党买不起呀)!

为什么选择 Keras 呢?
主要是因为简单方便。更多细节请看:https://keras.io/
什么卷积神经网络?
简单地说,卷积神经网络(CNNs)是一种多层神经网络,它可以有效地减少全连接神经网络参数量太大的问题。如果对其背后的原理感兴趣的话,斗胆推荐一些学习资料:
深度学习入门:基于 Python 的理论与实现
Neural Networks and Deep Learning
CS231n: Convolutional Neural Networks for Visual Recognition
下面就直接进入主题吧!
搭建环境
如果想要在个人电脑上搭建的话,我们需要先安装好 Python,进入:https://www.python.org/

下载安装就好。
之后,打开终端输入pip install -i https://pypi.douban.com/simple keras
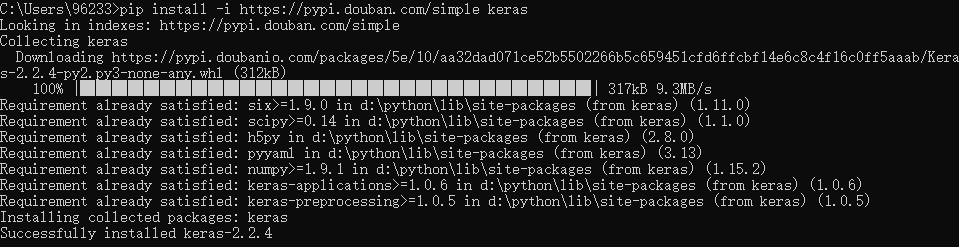
输入以下命令可以确认正常安装:
1
|
python -c "import keras;print(keras.__version__)"
|

当然,如果想直接使用Colaboratory的话,直接打开你的Google 云端硬盘

为了方便起见,新建一个名为 Keras 的文件夹,进入 Keras 文件夹,单击鼠标右键
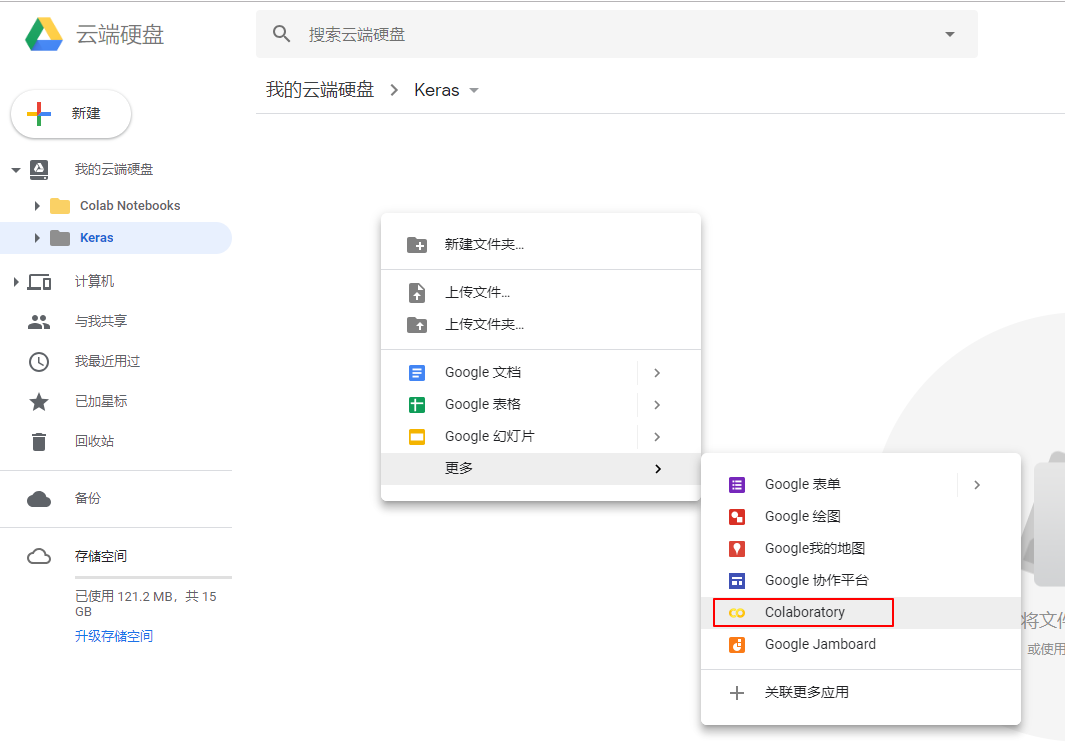
选择Colaboratory就可新建一个 Jupyter notebok 啦!
如果没有看到Colaboratory这一项的话,就选择关联更多应用

搜索Colaboratory,并关联即可。
导入库和模块
我们导入Sequential模型(相当于放积木的桌子)
1
|
from keras.models import Sequential
|
接下来,我们导入各种层(各种形状各异积木)
1
2
|
from keras.layers import Conv2D, MaxPool2D
from keras.layers import Dense, Flatten
|
最后,我们导入to_categorical函数,以便之后对数据进行转换
1
|
from keras.utils import to_categorical
|
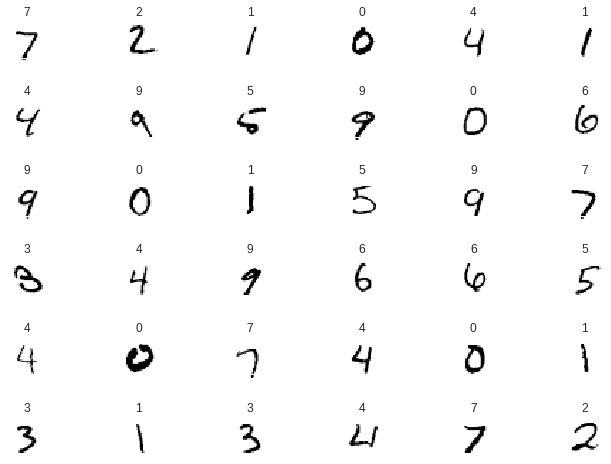
加载数据
MNIST 是一个非常有名的手写数字数据集,我们可以使用 Keras 轻松加载它。
1
2
3
|
from keras.datasets import mnist

(x_train, y_train), (x_test, y_test) = mnist.load_data()
|
查看一下训练集的大小
1
2
3
|
print(x_train.shape)

# (60000, 28, 28)
|
可以看到 60000 个样本,它们都是 28 像素 x28 像素的。
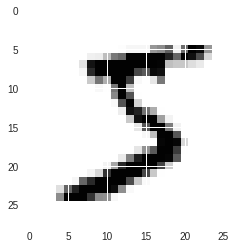
看一下这些手写数字长什么样
1
2
3
|
import matplotlib.pyplot as plt
%matplotlib inline
plt.imshow(x_train[0])
|
预处理数据
使用 Keras 是必须显式声明输入图像深度的尺寸。例如,具有所有 3 个 RGB 通道的全色图像的深度为 3。
我们的 MNIST 图像的深度为 1,但我们必须明确声明。
也就是说,我们希望将数据集从形状(n,rows,cols)转换为(n,rows,cols,channels)。
1
2
3
4
|
img_x, img_y = 28, 28

x_train = x_train.reshape(x_train.shape[0], img_x, img_y, 1)
x_test = x_test.reshape(x_test.shape[0], img_x, img_y, 1)
|
除此之外,我们将数据标准化一下:
1
2
3
4
|
x_train = x_train.astype('float32')
x_test = x_test.astype('float32')
x_train /= 255
x_test /= 255
|
之后,将标记值(y_train, y_test)转换为One-Hot Encode的形式,至于为什么要这么做?请查看:https://machinelearningmastery.com/why-one-hot-encode-data-in-machine-learning/
1
2
3
4
|
y_train = to_categorical(y_train, 10)
y_test = to_categorical(y_test, 10)
print(y_train.shape)
# (60000, 10)
|
定义模型结构
我们参照下图定义一个模型结构
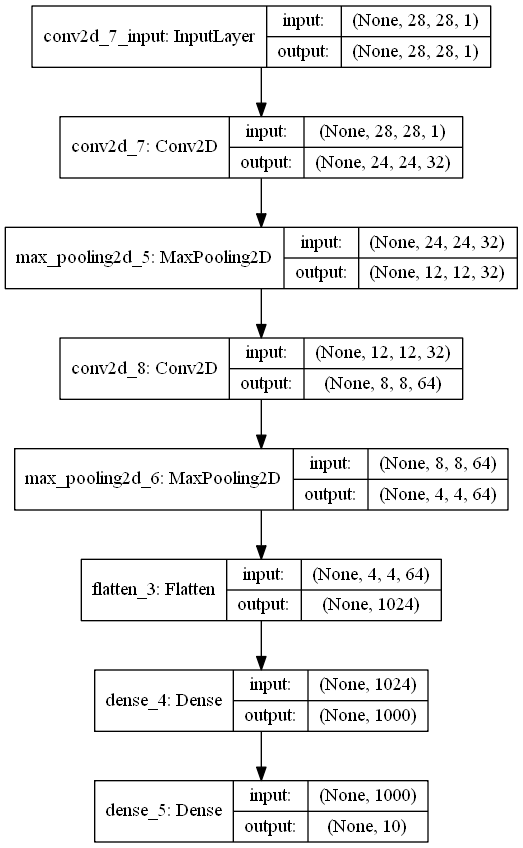
代码如下:
1
2
3
4
5
6
7
8
|
model = Sequential()
model.add(Conv2D(32, kernel_size=(5,5), activation='relu', input_shape=(img_x, img_y, 1)))
model.add(MaxPool2D(pool_size=(2,2), strides=(2,2)))
model.add(Conv2D(64, kernel_size=(5,5), activation='relu'))
model.add(MaxPool2D(pool_size=(2,2), strides=(2,2)))
model.add(Flatten())
model.add(Dense(1000, activation='relu'))
model.add(Dense(10, activation='softmax'))
|
是不是有点搭积木的既视感?
编译
现在,只需要编译模型,就可以开始训练了。当编译模型时,我们声明了损失函数和优化器(SGD,Adam 等)。
1
2
3
|
model.compile(optimizer='adam',
              loss='categorical_crossentropy',
              metrics=['accuracy'])
|
Keras 有很多损失函数和优化器供你选择。
训练
接下来,我们传入训练集进行训练
1
|
model.fit(x_train, y_train, batch_size=128, epochs=10)
|
以下是在Colaboratory上训练的过程

以下是在个人电脑上训练的过程
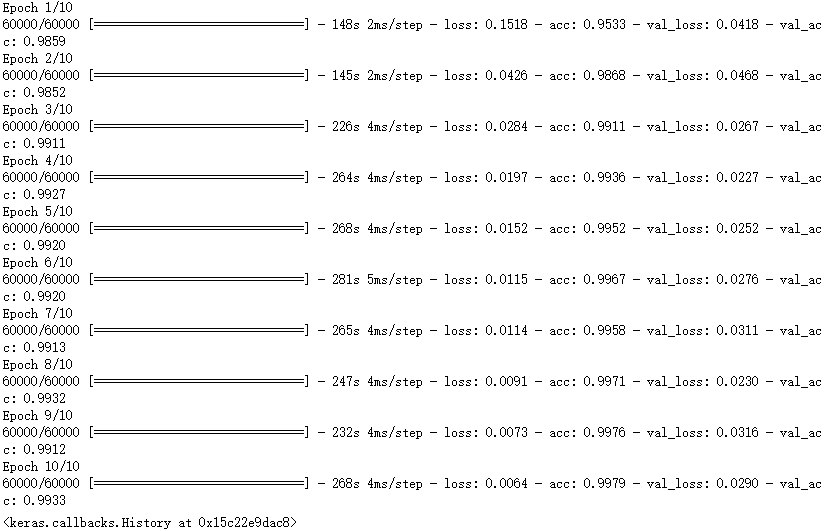
可以看到,花费的时间差别还是很大的!
评估模型
最后,传入测试集对模型模型进行评估
1
2
3
|
score = model.evaluate(x_test, y_test)
print('acc', score[1])
# acc 0.9926
|
准确率达到了%99 以上!
完整代码如下:
 1
 2
 3
 4
 5
 6
 7
 8
 9
10
11
12
13
14
15
16
17
18
19
20
21
22
23
24
25
26
27
28
29
30
31
32
33
34
35
36
37
38
39
40
41
42
43
44
|
# 2. 导入库和模块
from keras.models import Sequential
from keras.layers import Conv2D, MaxPool2D
from keras.layers import Dense, Flatten
from keras.utils import to_categorical

# 3. 加载数据
from keras.datasets import mnist
(x_train, y_train), (x_test, y_test) = mnist.load_data()

# 4. 数据预处理
img_x, img_y = 28, 28
x_train = x_train.reshape(x_train.shape[0], img_x, img_y, 1)
x_test = x_test.reshape(x_test.shape[0], img_x, img_y, 1)

x_train = x_train.astype('float32')
x_test = x_test.astype('float32')
x_train /= 255
x_test /= 255

y_train = to_categorical(y_train, 10)
y_test = to_categorical(y_test, 10)

# 5. 定义模型结构
model = Sequential()
model.add(Conv2D(32, kernel_size=(5,5), activation='relu', input_shape=(img_x, img_y, 1)))
model.add(MaxPool2D(pool_size=(2,2), strides=(2,2)))
model.add(Conv2D(64, kernel_size=(5,5), activation='relu'))
model.add(MaxPool2D(pool_size=(2,2), strides=(2,2)))
model.add(Flatten())
model.add(Dense(1000, activation='relu'))
model.add(Dense(10, activation='softmax'))

# 6. 编译
model.compile(optimizer='adam',
              loss='categorical_crossentropy',
              metrics=['accuracy'])

# 7. 训练
model.fit(x_train, y_train, batch_size=128, epochs=10)

# 8. 评估模型
score = model.evaluate(x_test, y_test)
print('acc', score[1])
|
参考

 支付宝
支付宝
 微信
微信